One of the features that keeps me stuck to REAPER unlike any other DAW, is the Render Queue. If you find yourself dealing with multiple songs on a single session, or just have multiple formats you are expected to deliver, this function can be a godsend.
Let’s say you’ve recorded a live set at a venue, have your processing on each respective mic, and your client asks for a WAV+MP3 of each song. This lets you save your selection and render options, and queue as many instances necessary before running through the sequence. REAPER’s render queue turns a 2 hour task, into 10 minutes, and walking away.

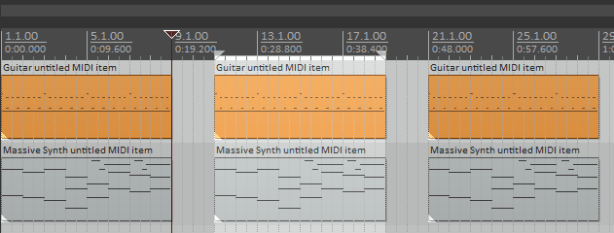
So let’s get into the meat of it. If you look at the picture above, I have three distinct chunks of MIDI instruments that I want to render. I’ll select the region by dragging along the timeline.
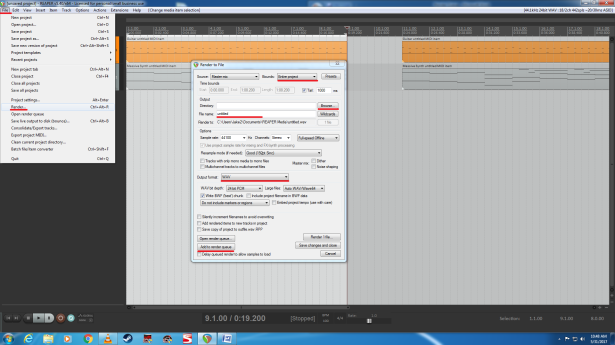
To add this item to my render queue, I’ll press File>Render… The important parameters and buttons are underlined in the picture above.
- Change the Bounds: from Entire Project to Time Selection
- Name the export. (this one will be a wav)
- Choose export directory.
- Choose format. (WAV is default, LAME encoder required for MP3 in REAPER)
- Add to render queue
Instruction #5 will close the render menu, and the first item will be queued.

If you would like to queue up an MP3 as well, open the Render menu again, change the format, and press Add to render queue once again.
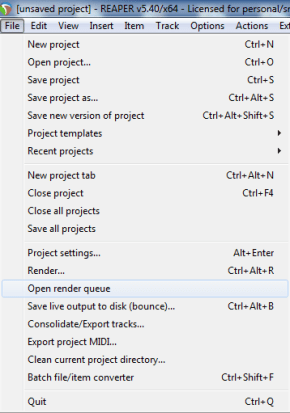
To check your Render Queue (list), press File>Open Render Queue.

You’ll see a menu like pictured above. You should see as many list items as you have queued up. If you make a mistake, this is where you can edit your queue.
Time to repeat this process for the rest of the items. Select your next item, rinse, wash and repeat.
Now that I have an MP3 and WAV render queued for all three items, my render queue looks like this..

A simple press of the “Render All” button, and we are off to the races. One by one, Reaper will open your render selections in a new tab, give it a run through, and move on to the next.

This has been Jake Duffie, the Recording Tech with the Underground Alliance, and support crew to the MONTEITH machine. Hope you’ve found this helpful!
EDIT – 2019/06/14 – I’ve released a new article on how to save a render queue, so you don’t have to go through your render settings every time you want to print off multiple tracks. Check that out HERE.
