When installing programs on Windows, all of the files required to make the software run don’t always go into the same place. Sometimes your installer keeps configuration data in a hidden system folder named “AppData”, keep important resources in your documents, or any number of reasons simply moving your program folder around won’t run on another computer.
While this is inherently true of REAPER as well, it the installer comes with a portable install option. Whether you need to move your software around, run parallel instances of REAPER, or just have two separate configuration builds, today you will be getting your answers!

First thing’s first, let’s go to the REAPER download page. If your computer was built in the past 5-10 years, it is a safe bet that you are running a 64bit OS. If you aren’t sure, run the “System Information” desktop app. (win10).

Whether you are on the computer you will want to move REAPER to, or at another remote location, you can open up the installer from your downloads folder. After agreeing to the EULA, you’ll be at the location selection. This is where you will be checking “portable install”, so make sure not to click past this page.

(for this example, I will be portably installing reaper onto my desktop, to later be moved onto a USB stick. This will work whether or not you already have REAPER installed on your computer via the default method).
Ensure that you are installing into an empty folder, instead of a higher-level folder that is already in sure.
We will want to grab 3 files before we open up our new portable version of REAPER. Our configuration file from our main instance of REAPER, the SWS installer, and our license. (presuming you have bought the software).
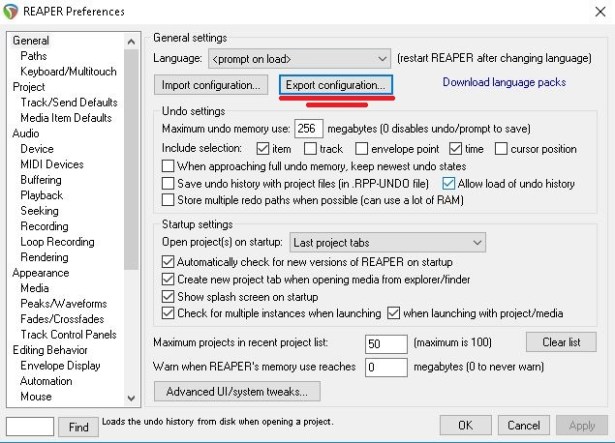
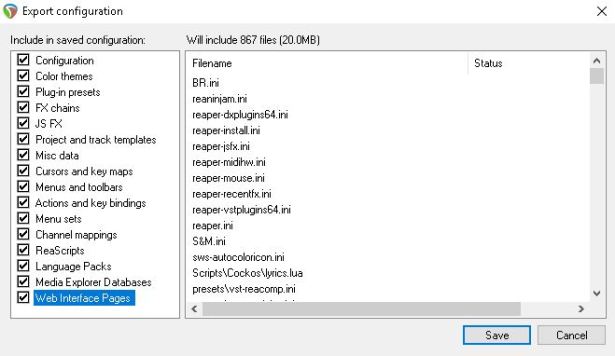
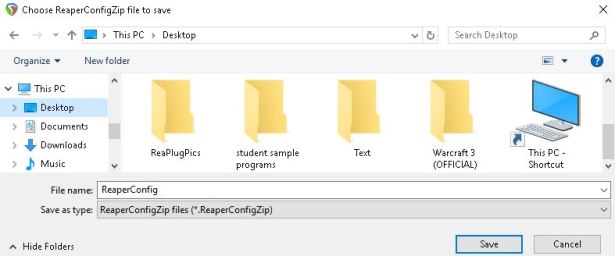
Open your instance of REAPER that you normally use. Either press ctrl+p, or Options>Preferences to get into your settings, and make sure you are on the “General” tab. As pictured below, there will be an “Export Configuration…” button. After choosing the aspects of your configuration you would like to transfer, and choose a destination, your settings will be ready to import from a .ReaperConfigZip file

Next up, we will be installing the SWS extension. (Download here)While optional, I highly recommend always having it installed. (More info on the SWS extension here). Make positive to select your new portable version of REAPER as the destination folder, and install.


There’s not much I can do to help you find your license. You either haven’t lost your copy yet, or it’s a good time to give Cockos an email.
Time to launch up our new instance of REAPER. You can skip past selecting an audio device for now, as that may change from system to system. (and we will be importing settings regardless). When you get your launch message, either import your key, or continue with the trial. If you do have your key, you will want to have it imported before you start moving the folder from system to system.

Once you get into the main REAPER interface, we will be going to the preferences again. (ctrl+p). This time, we will be hitting “Import Configuration…”

At this point, our portable version of REAPER is licensed, configured, and loaded with the SWS extension. That folder is ready to pop onto a USB stick, and install on whichever system you choose.
An important thing to consider before shipping your portable version of REAPER off to the next computer, is which plugins you will need, and whether the system you are moving REAPER onto will already have a directory of plugins to be linked.
If you are moving to a computer without any plugins, or you are not certain, it may be a good idea to load some extra plugins you like into the plugins folder in your new portable REAPER folder. Reaper comes with a large suite of low CPU usage plugins with functionality as the priority, but any third-party plugins you can’t do without have to be moved and installed yourself.
If you know the computer you are moving to already has the plugins that you want to use installed, you will have to set the destination path. Once you arrive to the second system, you will want to enter your preferences (ctrl+p), select the VST tab, and add the path to which your plugins are installed.

That will do it for today! The REAPER can fly, spread the curse upon every computer you use. Thanks for checking out this article, and stay tuned for more tutorials, music, personal news, and more.
