Hello ladies and gentlemen, it’s your good pal Jake from The Underground Alliance! Today, We’ll be talking a little bit about starting a fresh mix, assuming the tracks have just finished been recorded or handed over to you as the mixing engineer
This is very much an opinion piece. None of these are rules, just the order I tend to do things to keep my sessions clean to work with, and sounding the best I can possibly get them. I’ll be working with the multitrack for a MONTEITH tune, but Cambridge has a wealth of mutitracks to practice with if you’d like to follow along.
STEP 0 – Where did you save the session, and what did you call it?
If you are like me, and perhaps a little lazy, your session might start thrown into a folder on the desktop, called BANDRECORDING.sesh or the like. Remedy this immediately. Give the session and folder a name you will be able to look up later, I’ll often include the date. Back that version of the session up somewhere safe.
From there, open your session. Do a save as, and add a term like “mixbegin” to keep a seperate version of your work on the mix, from an original dry input session. When shit hits the fan, every version of your project that you have can be your saving grace.
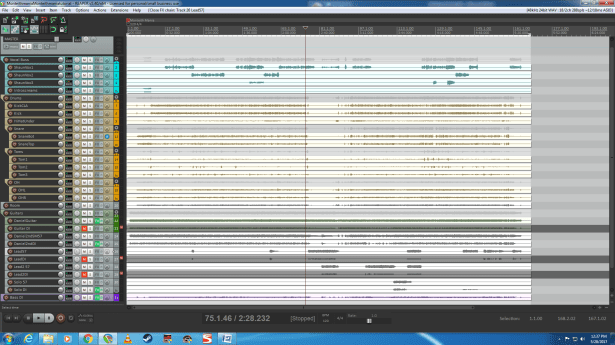
STEP 1 – Organization
If you are dealing with a fully micced drum kit, the full band, and perhaps even still needing overdubs, it will save you a lot of time and effort to keep things clean from the get-go. I’ll be using Reaper, so I will be using to “folder-track” to group my different tracks. Depending on your DAW, you may need to use another tool for the job. Pro Tools, for example, just has a groups menu.
REMINDER – If you have a top and bot snare, most of the time, you’ll have to phase invert either or. Look for this symbol in your DAW, or within a plugin. (ø)
I’ll start by grouping the drums together, the vocals together, and the guitars together. On top of that, If I have multiple inputs on one drum, I’ll go one level further and group those all together. (a snare group, a kick group). The toms/overheads are last ones I will give their own groups, and moving on!
If you are familiar with Reaper, you may notice I already have some FX turned on. That’s just Guitar Rig on the DIs, we’ll be getting to some rough starting FX further down in the article.
STEP 2 – Levels
Give that sucker a play, and how does it sound? Without high/low pass filters where they are needed, it’s probably going to sound a little scratchy and shitty, but with consiencious mic usage, placement, and gear choice, it could already sound like it’s on the right track. At the very least, your volume levels will be a bit of a mess with all your faders at unity, so it’s time to start giving them a nudge in the right direction. Don’t worry about spending too much time here, as your FX chains will change the overall loudness of each track.
(It is also possible to skip this step, apply your FX in solo on each track, and get your level s afterwords, but I will explain below as to why mixing everything in solo isn’t a great idea)
Rather than just pushing the faders around while everything is sounding at once, it can be crucial to solo 2 or more items against eachother to find the best relative volume for tracks that take up similar sound spectrum space, or have similar musical importance as to how clearly they are heard. I’ll be walking you through how I do it.
Solo your drums, Pan your OHs 100% left and right respectively, and bring them down to taste. These are often my quieter tracks, with the snare and kick needing to cut so deeply through the mix. Solo your kick and snare, and get a solid volume ratio between the two, and keep them quite high. Pan your toms similar to the way they were laid out on the kit, a rough guess should be plenty, and bring those down a good deal. You may want to bring those back up later to have your toms louder, but for now, that’s a lot of mic noise/bleed for a couple hits here and there, where the toms will also be picked up by the OHs. (this is pre-mix thinking, everything is to taste when it comes down to the final product.) If you have a HiHat mic, I’ve often found those need to be kept quite low.
Solo your guitar tracks, and get them set reletively to eachother. My volume priority is…
- Solos 2. Rhythms 3. Other leads
That is the most complex of it, from there, add in the bass until it sounds good with the drums. Then slowly bring the guitar into it until you’ve got a solid instrumental mix. I don’t worry much about the vocals at this point, except to mix them against eachother. With vocals needing to ride on top of the mix the way they do, they are going to be subject to a whole lot more volume control/FX than anything else.

STEP 3 – Rough FX
So many places to begin, so let’s start with the drums. There will be plenty more you will want to do to these tracks, but this will give you a rough start. When high/low passing, i’ll be quite conservative on how much of the spectrum I’m letting through. You may what to chop it tighter.
KICK – Compress and Lowpass around 12-15k to start. Leave some makeup gain on the compression so you aren’t losing too much volume. Leave the attack around at LEAST 10ms+, as you do not what to chop off too much of the transient. (unless you do)
SNARE – Compress and highpass at around 100hz. Don’t forget to phase invert one of your snares, if you have a top and bottom. Use your ear, and see when it sounds proper. If both mics were placed the exact same distance away, there will be a fair amount of phase cancelation.
OVERHEAD L+R – Highpass around 200hz, and squash with the compression. While I tend to leave my compression ratios fairly low, this is one to really put an agressive wall on.
GUITARS – You will almost always have to do some low/high passing on every guitar track, about 150hz and 15-18k respectively. Maybe a little compression to start, and move on! We are just doing our rough work right now.
BASS – This one is going to massively depend on your input. If you are dealing with a DI, is a much different game than dealing with an amp mic. The one tip I will leave you with though, is that I have been getting a lot of work out of trying to leave the bass mostly in the low-mid section of the audio spectrum, rather than just a big booming sub-machine. The compression will have a lot to do with the dynamics of the song. A heavy song, I would squash the bass with a pretty low attack. A groovy tune, I’d leave as much dynamic range as possible, with a bit of a lower ratio, and higher attack.
VOCALS – This will depend a a whole lot on your source material, but here’s the basics.. EQ/Deesser/Comp/Verb, a vocal rider has also been in my generic vocal chain. When Eqing, resist the urge to EQ it like a guitar. Don’t scoop it. A solid push in the mids will really let those vocals sit in the “jazz curve” that I, and likely you have scooped out of every track, every chance you’ve gotten.
While these are some good tips for cleaning up the sound of each track, don’t hesitate to do some artistic boosting and cutting!
These basic mixing tips here are painted with a wide enough brush to get the job done soloing each track, but it should be kept in mind that is NOT a good way to mix at all times. Pop that solo button off often and readily. Leave a couple of tracks, if not all of them sounding when you are setting your FX. When you are pushing around an EQ, You can make some really WRONG decisions, when you are making something in isolation sound “cool”, but the frequency you choose to boost was the same one you choose on the last three tracks. While it is not always the approach for the music, trying to keep 20hz to 20k at least mostly filled in on the audio spectrum, not cutting or adding too much on the same spot is a mentality to start with.
STEP 4 – Levels (again)
With all of this compression, EQ cuts, and makeup gain, our levels have probably shifted a fair bit. Repeat step 2, push some faders! The Drums against the bass, pull the guitar into the mix, and now bring that vocal group up to the right volume. Look at your master. Bring ALL of your tracks up or down until your highest peak is around -6db. As long as you aren’t clipping, you’re solid.
And that’s a start! It should still be some rough work at this point, but this process makes things much less complicated for future work. A little organization and prepwork can make a fresh session a whole lot less daunting to sit down to.
I hope this has been helpful, that’s all for today.
Thanks for reading through!
